Facial surgery is highly individualised and may be considered for a range of aesthetic and functional reasons. This gallery features examples of outcomes following face procedures performed by Dr Gary Kode. These images are provided for reference and educational purposes only. They are not intended to suggest a particular result is achievable in every case. Every person’s anatomy, healing response, and goals are different, and surgical results will vary.
All procedures are carried out by Dr Gary Kode, Specialist Plastic and Reconstructive Surgeon, following detailed consultation and planning.
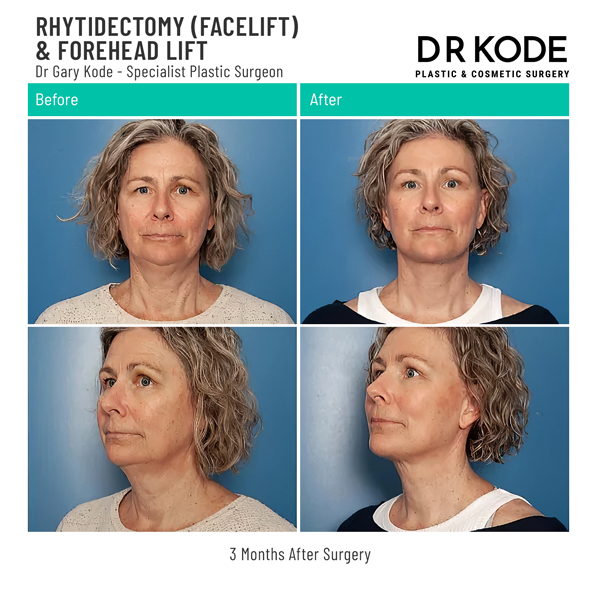
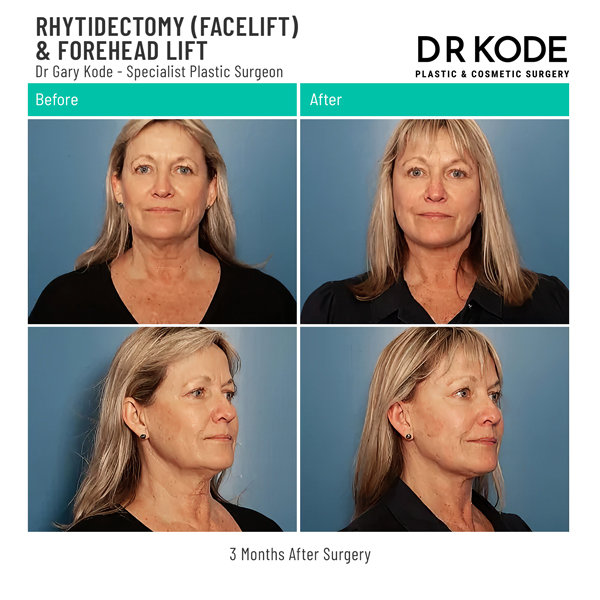
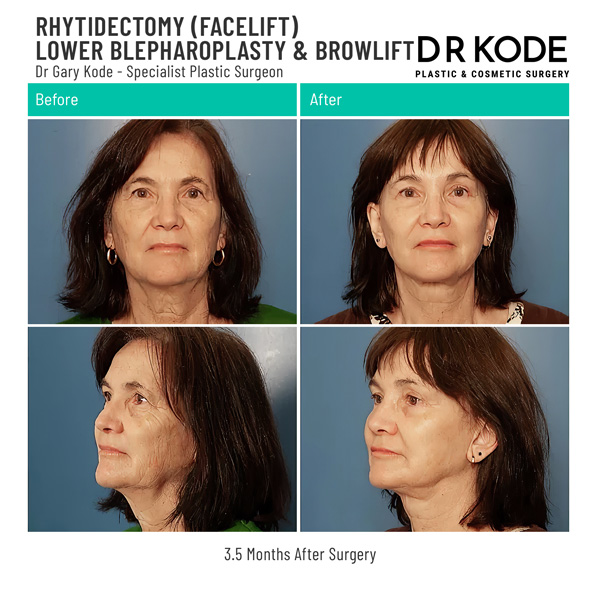
Facelift (Rhytidectomy) Before and After Photos
Facelift (rhytidectomy) addresses changes in facial appearance that can occur over time. It involves surgical techniques that reposition underlying tissue and adjust skin in targeted areas of the face and neck. The specific approach is customised to suit each person’s facial structure and goals.

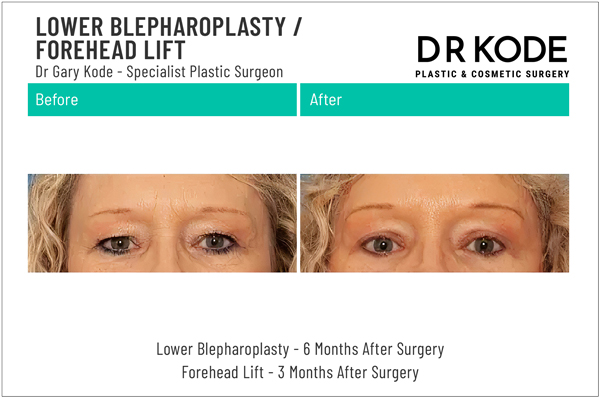
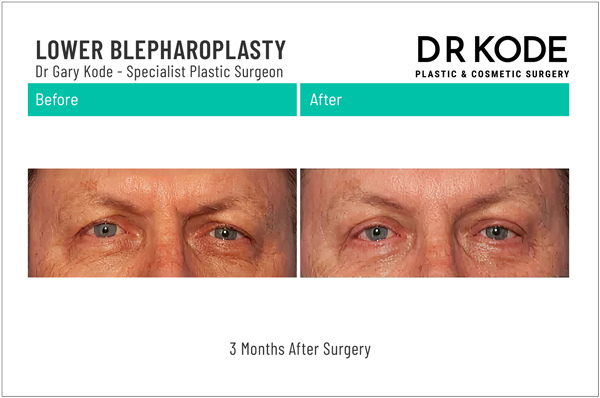
Blepharoplasty Before and After Photos
Blepharoplasty (eyelid surgery) involves surgery of the upper and/or lower eyelids. It may be considered when changes in the eyelid area contribute to a heavy or tired appearance, or when they begin to impact the visual field. The procedure is tailored to the individual and may involve removing or repositioning skin and tissue, with a focus on supporting eyelid function and overall facial balance.
Determining Your Suitability for Surgery
The only way to determine whether a procedure is appropriate for your individual circumstances is through a consultation with a qualified Specialist Plastic Surgeon who has experience in the surgery you are considering. Dr Gary Kode offers individualised assessments based on your medical history, goals, and clinical presentation.
In accordance with current AHPRA (Australian Health Practitioner Regulation Agency) guidelines, all patients must now have a valid referral from a GP or medical specialist before booking a consultation with a Specialist Plastic Surgeon. This process supports informed surgical care and makes sure that all aspects of your health are considered before proceeding.
Disclaimer
Before and after photos are shared for general information purposes and feature real patients who have provided written consent for their images to be used. Outcomes vary between individuals due to a range of personal factors, including anatomy and the specific surgical approach. These images are not intended to suggest that similar results will be achieved. A consultation is required to assess your individual needs and discuss your options.